If you’re a new blogger, you need to understand the basics of HTML; whether you want to leave a comment on another blog, or you want to include a text widget on your own blog, knowing some basic HTML helps.

To help you do this, we’ve created a basic bloggers HTML cheat sheet for you to download, print up, and refer to.  If you are unfamiliar with HTML, read this post first for a brief overview, or scroll down to the end if you want some online resources to learn more about HTML.

Note: This is by no means a complete guide to HTML, but we’re fairly confident it will give you a good start. If you have any questions, or suggestions, we’d love to hear them.

What is HTML?

HTML stands for Hyper Text Markup Language; simply put, it’s a language used to create Web pages.   It contains embedded commands called tags that are interpreted by a Web browser; these tags allow you to format your text so it appears as bold, italicized, links, headings, lists etc.

Basic HTML Jargon

Command: A command is what you want the browser to do.  For instance, make something bold, or create a list, or link to another site – you are commanding the browser to do something.

Tags: Tags are where you place your command and are represented by the less than and greater than symbols: < >.

Generally, each command will have two tags; the opening tag [always <>], and the end tag [always </>.   In the space between them is where you put the text you want to manipulate.   Occasionally, you will need to use a single tag; this happens with image and line break commands, but they are more the exception than the rule.

Opening tag: The beginning or opening tag is always represented as

Less than symbol, command, greater than symbol e.g.: <command>

End tags are always represented as:

Less than symbol, forwardslash, command, greater than symbol e.g.: </command>

Note: Most commands require the end tag.  Of all the commands listed in the cheat sheet, only the line break command <br /> requires no end tag.

Attribute: Certain commands can be modified further by using specific ‘attributes.’  For instance, when using the font command (telling the browser which font you want to use), you can further modify it by adding a ‘color’ attribute, which will change the color of the text, or the ‘size’ attribute, which will change the size of the font.   A space must always precede the attribute.

Tip: Commands are not case sensitive. However, convention calls for lower case.

Note: Stylesheets (CSS) may override some attributes. As we are not talking about CSS coding here, this should not apply to you.

A few things to keep in mind:

Tags Used for Headings are Important for SEO

Headings range from H1 (the largest), to H6 (the smallest).  This is important to know for SEO purposes. If you think something deserves to be a H1 because it is important, Google too sees it as important, and gives it more weight than it would give a H2 or H3.  It is important to remember with H1 tags, that you should only use one per page.

If you want a thorough understanding of heading tags, take a look at Stoney deGeyter’s post: How to use Hx Tags over on the Search Engine Guide blog

Bold vs. Strong Tags, and Italic vs. Emphasized Tags

There is some confusion about which command is best to use when creating italic text and bold text; let’s just clear that up quickly.

Originally, the bold tag was represented as <b>.  A new command has now come along, known as the strong tag <strong>.  While they do much the same thing, the sturdier of the two is <b>, as <strong> does not necessarily work in all browsers yet. To play it safe, use the original <b> for bold.

The same applies to the italic tag.  Originally represented as <i>, the newer command is <em>.  Again, the sturdier is <i> and should be used to ensure your italicized text appears correctly across all browsers.

Useful HTML Online Resources:

Online HTML Tutorial:

W3 Schools offers free tutorials and references relating to web development, from basic to advanced.
Their references cover all Web-building technologies, including W3C standards like HTML, XHTML, CSS, XML as well as other technologies like JavaScript, PHP, ASP, SQL.

Additionally, with their online HTML editor you can edit the examples and experiment with the code as you learn it.

W3Schools HTML Primer
W3Schools HTML Tutorial

Other online HTML Resources:

HTML Basics 101: from The University of South Dakota

WebMonkey: Free public resource for Web workers

Color Lovers : Thousands of colors and their HEX values; searchable.

Cheat Sheets:

Bloggers HTML Cheat Sheet (PDF)

More advanced HTML Cheat Sheet from Added Bytes

Basic Blogging Tips

This is a guest post by the lovely Kat, from Big Girls Don’t Cry, and talks about her trials and tribulations when it comes to blogging basics.  Take a look at the four main issues she had, and her solutions.

Starting To Blog

When I started blogging a year or so ago, there was much about blogging that confused me.  Here are the main problems I encountered, and my tips; hopefully they’ll help you too.

Choosing the right blogging software

When you start blogging, you first need to address which blogging software to use.  In my case, I use WordPress, (the software and wordpress.com) and Blogger.

For me they are the best, of course, there are many more.  All you have to do is Google ‘blog software’ and sift through to find what suits you.  All three I use are available for free.

What you need to ask yourself is: Do I want a one page blog or a blog that can accommodate many pages, much like a website?  Blogger only allows for one page; WordPress gives you the flexibility to have many pages, which is handy if you are trying to create a website feel/look.

Coming up with content for your blog

When I first started Big Girls Don’t Cry, my content was entirely about the plus size world.  This entailed fashion, discrimination, health, fitness – anything that has to do with being overweight or obese.

You need to decide what you want to write about, and then research it.  I’ve found keeping a note book is really handy, so if you see or read something in a magazine that could potentially be a blog post, you can quickly scribble it down.

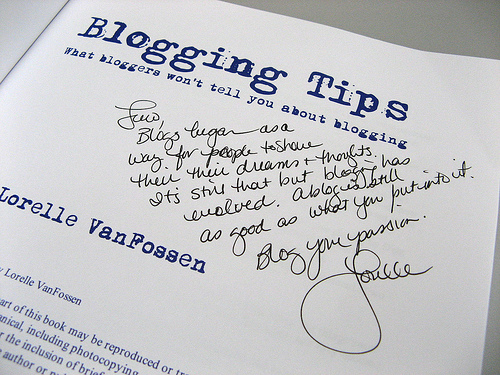
If you find it difficult to find something to write about, here is a great resource I found for finding content for your blog.  Lorelle’s blog also offers useful tips about using WordPress.

Putting ads on your blog when you don’t know HTML

For me, this was the most difficult to do because I have no programming or Web knowledge other then doing searches on the web, so putting ads in my sidebar was tricky.  Luckily, when you apply for an affiliate program they will email you the HTML code, and show you what the ad will look like; you simply cut and paste it.

Understanding broken links

While not obvious, when you include links in your posts, you should always check them every couple of months to see if they are still valid (that they actually go to the right place).

It helps you because if your readers can trust your blog to give the correct information, then your community will grow.  No one likes sloppy work, and you should include this practice as part of your blog plan; a good online link checker is available at W3C

Blogging Tip 1: Create several pillar posts

Take a look at this post on why writing well is crucial for new bloggers.  Note: If you’re not familiar with pillar posts, check out the characteristics of pillar posts.

Blogging Tip 2: Include images in your posts

Sometimes a picture tells a thousand words and is extremely eye catching.  I use the creative commons license for images at Flickr to get images for free.  Take a look at Skellie’s post if you’re not sure how to use free images from Flickr.

Blogging Tip 3: Institute an Editorial Calendar

Creating an editorial calendar enables you to organize yourself and stay on task.  For instance, one of my categories is Health, so on Monday’s I could write a post about health; another category is recipes, so on Tuesday, I could include a recipe.  You get the idea.

If you need help, take a look at this post on how to create an editorial calendar, or download this editorial calendar worksheet and just fill in the blanks.

I hope you find all of this information helpful to starting up your own blog.

Happy blogging!

Kat

Image source: Flickr: Liewcf

Last week I was lucky enough to guest on The Drill Down (Ep. 55).

Although I had butterflies in my tummy, and an awful connection, I had a great time.

If you don’t listen to The Drill Down, you should.  The Digg Trinity, Mr. Babyman (Andrew Sorcini), Zaibatsu (Reg Saddler), and MSaleem (Muhammad Saleem), talk all things technology every Friday night at 8.30 PM PST on Ustream.

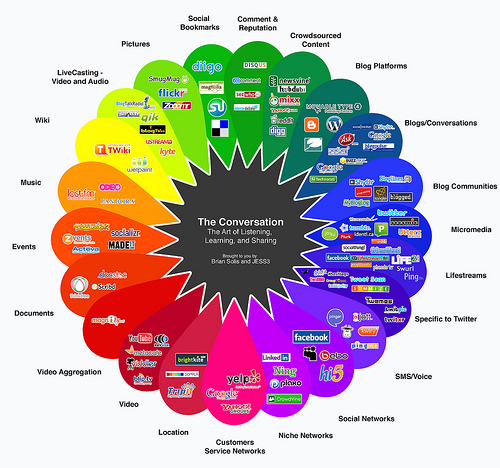
Are you interacting with your customers online?

There’s a webinar happening over at Mzinga next Tuesday (free) about the importance of cultivating, monitoring, and managing your online conversations.

Topics will include:

  • Key components of effective community management
  • Multiple moderation techniques and advice on which are best for your business
  • Industry statistics on the link between moderation and management and community success
  • Featured case studies from leading brands with thriving communities

Date and Time:

September 9, 2008, 2.30 E.T (Check current time here)

Register here

Speakers:

Scott Monty: Head of Social Media, Ford Motor Company
Scott on Twitter

Mike Pascucci: Director of Moderation Services, Mzinga,
Mike on Twitter

Aaron Strout (Moderator)
Aaron on Twitter

Note: There’s an interesting and related post over at Jeremy Owyang’s blog you should take a look at: Why some don’t need to join the conversation

Claudia – this one’s for you ;)

Story via: Scott Monty”s blog

Image: Brian Solis

One of the nice things about FeedBurner is that it allows people to receive your feed updates via e-mail.

FeedBurner lets you see the e-mail addresses of your subscribers, and even allows you to download them to your computer, so you can count them, graph them, as is your want. However, it’s not as easy as it should be.

This post is a step by step guide to exporting the e-mail addresses of your subscribers to Microsoft Excel – just remember, don’t abuse the privilege of having access to people’s e-mail addresses.  If you spam them, they may unsubscribe.

How to Export E-Mail Addresses From FeedBurner

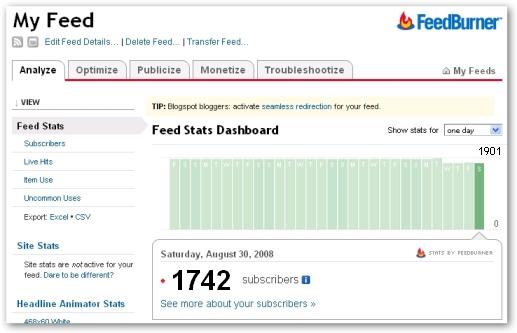
Step 1: Select your feed

Select the feed which you want to view the e-mail subscription for.

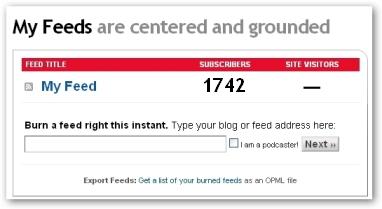
We will use our “My Feed” feed – the names have been changed to protect the innocent.

Step 2: See More About Your Subscribers

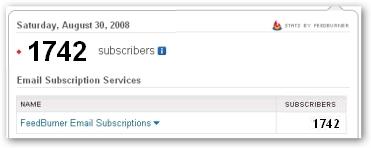
Select “See more about your subscribers”.

Step 3: FeedBurner Email Subscriptions

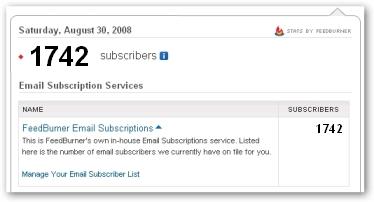
Within the “Email Subscriptions Services” section select “FeedBurner Email Subscriptions”.

Step 4: Manage Your Email Subscriber List

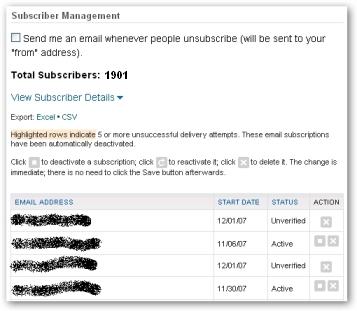
Select “Manage Your Email Subscribers List”

Step 5: Export to Excel

Select “Excel” as the export type.  If you don’t have an application which can read Excel XLS files, then you can download the subscriber list as a text file in CSV (Comma Separated Values) format.

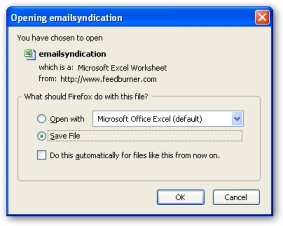
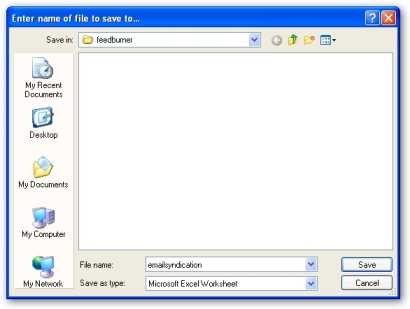
Step 6: Save As

Save the file to your computer now rather than later from within the application used to view the file.

Yep, we use Firefox, as do most of the people who read our blog.

Step 7: Browse

Browse to the folder you wish to save the file to.

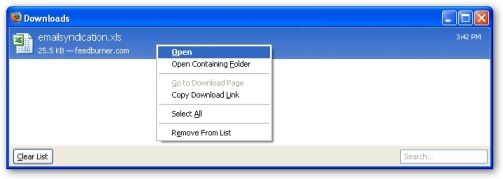
Step 8: Download Complete

Wait for the file to be downloaded – should be quick.  If your file is considerably large then congratulations, you must have lots of subscribers.

Step 9: Opening Downloaded File

Open the file downloaded.  Either double click the entry, hit Enter, or right click and select Open.

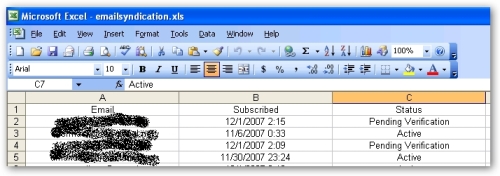
Step 10: Viewing Subscriber List in Excel

The data can now be viewed and manipulated within Excel.

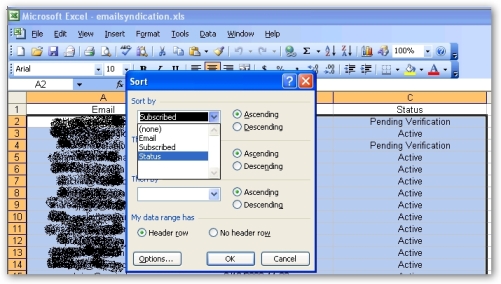
Step 11: Sorting Subscriber List in Excel

if you want to sort the data, so that all the Active e-mail subscribers are at the top for example, then make sure you are within any of the data cells, select Data – Sort and then select “Status” as the first column to sort by.

Don’t Spam

Remember, don’t abuse the privilege of having access to your subscriber’s e-mail addresses.

« Previous PageNext Page »